

Are you tired of spending hours hand-watering your garden every day? Do you want to ensure that your plants receive the right amount of water consistently to thrive and grow? If so, installing a slow drip system may be the perfect solution for you. A slow drip system delivers water directly to the roots of your plants, promoting healthy growth and reducing water waste. In this step-by-step guide, you will learn how to install a slow drip system in your garden so that you can sit back and relax while your garden flourishes.
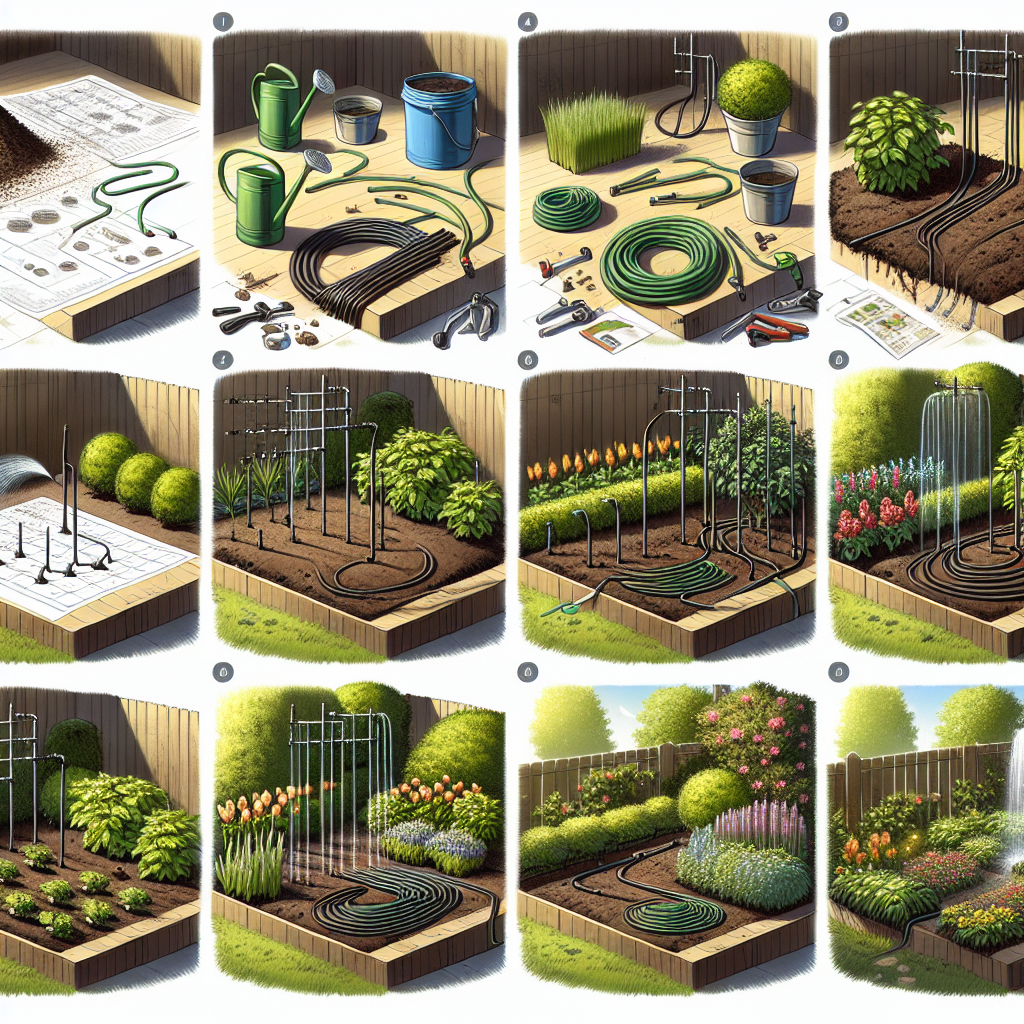
**Selecting the Right Materials**
The first step in installing a slow drip system is to gather all the materials you will need. You will need a few key items, including a pressure regulator, a backflow preventer, tubing, drip emitters, stakes, and connectors. Be sure to choose high-quality materials that are durable and will withstand outdoor conditions. Additionally, make sure to measure the length and width of your garden so that you know how much tubing and other materials to purchase. Once you have all of your materials gathered, you are ready to move on to the next step.
**Planning Your Drip System Layout**
Before installing the drip system, it is essential to plan out the layout of your system. Consider where each plant is located in your garden and how much water each plant will need. Take into account any slopes or elevation changes in your garden that may affect water distribution. Once you have a clear plan for where each component of the drip system will be placed, mark those spots in your garden with stakes or flags so that you can easily visualize the layout before installation.
**Installing the Mainline Tubing**
The next step in installing a slow drip system is to lay down the mainline tubing. Start by connecting one end of the tubing to an outdoor faucet using a pressure regulator and backflow preventer. These components will help regulate water pressure and prevent contaminated water from flowing back into your home’s water supply. Lay out the tubing along the planned route in your garden, making sure it reaches all areas where plants are located. Use stakes or clips to secure the tubing in place and prevent it from moving around.
**Adding Drip Emitters**
Once the mainline tubing is in place, it is time to add drip emitters or micro-sprinklers to deliver water directly to each plant. Drip emitters come in various flow rates, so be sure to choose ones that match the watering needs of each plant in your garden. Insert drip emitters into the mainline tubing at each stake marking where a plant is located. Make sure that each emitter is placed close enough to the plant’s roots so that it can efficiently deliver water without wasting it.
**Testing Your System**
After installing all components of the slow drip system, it is crucial to test it before leaving it unattended. Turn on the faucet connected to the mainline tubing and check for any leaks or malfunctions in the system. Walk around your garden and inspect each emitter to ensure that water is being delivered properly to all plants. Make any necessary adjustments or repairs as needed before letting your slow drip system run on its own.
**Maintaining Your Slow Drip System**
Once your slow drip system is up and running smoothly, it is essential to keep up with regular maintenance tasks to ensure its continued effectiveness. Check for leaks or clogs in the mainline tubing periodically and clean out any debris that may be blocking emitters from delivering water properly. Adjust flow rates as needed based on changes in weather or plant watering requirements throughout different seasons.
In conclusion, installing a slow drip system in your garden can save you time and effort while promoting healthy plant growth by delivering water efficiently directly to roots where it’s needed most. By following these steps outlined above for selecting materials, planning layout carefully before installation; laying down mainlines tubings securely; adding appropriate emitters; testing systems thoroughly after installation; maintaining regularly thereafter -you can enjoy beautiful thriving gardens without having worry about watering them daily manually anymore!


