Container Growing
Successful container growing means getting back to the basics - soil, food and water - container gardens have a few special needs that differ somewhat from your in-ground flower beds.
1. Buy healthy plants
2. Plant in clean pots that are the right size for the mature plant
3. Use the right soil and fertilizer
4. Water as needed
5. Inspect containers regularly to head off problems before they occur
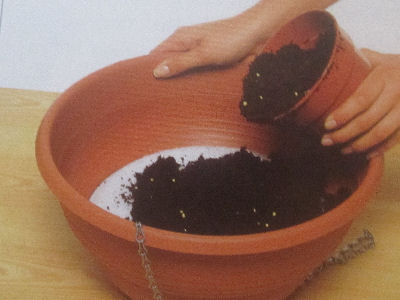
The right soil mix
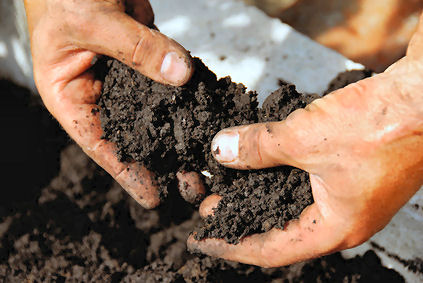
The first step to successful container growing - use the right soil.
When I first started growing container gardens, I tried using the same soil that I used in my flower beds. Learn from my mistake - plants grow best in containers with potting mixes that contain little soil!
Potting mixes drain better and don't get compacted in the pot. They are also lighter weight and keep your containers from being too heavy.
If you are growing on balconies or rooftops where weight is a concern, lighten the container further by mixing perlite in the soil. Perlite is a crushed volcanic rock that is very lightweight but holds moisture very well. It also helps the soil retain nutrients.
For plants that require good drainage – succulents, cacti and some herbs are a few – choose a potting mix with a high percentage of coarse material like bark and perlite. For moisture loving plants, like many annuals, look for a mix with a high percentage of sphagnum peat moss.
If you are using large pots or boxes for your container growing, put some gravel, sand or other filler in the bottom of the pot. Filling big containers with just garden soil gets really expensive and most flowers don't have roots that go farther down than 12 inches.
Empty plastic bottles for soda or water are good to use - they can take up some of that space in the bottom for you and allow water to drain through just fine. Some people also use Styrofoam packing pellets.
Of course, if you are container growing shrubs, trees, or even some large perennials, they will need a deeper level of soil for best performance. Follow the planting directions for the particular plant or tree.
Potting soils come in lots of different varieties now to meet certain needs of the gardener or plant. I like the moisture control mixes. They are good if you have trouble finding time to water every day or if you live in a hot, dry area.
Some mixes have fertilizer added. You can also add a granular form of slow release fertilizer yourself - just follow the package instructions - for container gardens, it is generally recommended that you use about half the fertilizer amount that is recommended for garden beds.
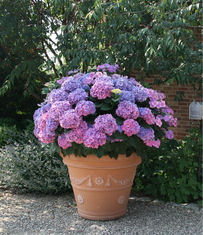
Successful container growing of certain plants may require soil that is more acidic or alkaline. This is measured in pH. Plants like hydrangeas (left) or azaleas are some of these. Check the planting guidelines for pH and add to your soil as directed. You can also buy soil mixes that already have a certain pH for these types of plants.
Compost is an organic material that enriches your soil. Lots of gardeners have compost bins or piles. If you have the space and the inclination to make your own compost, it is a great soil additive and it is eco-friendly. You may also benefit from learning how to compost with worms for healthier plants and richer soil.
Backyard and indoor composting are most suitable for households to convert small quantities of organic materials, like yard trimmings and food scraps into compost that can be spread in garden beds, around shrubs and used as an additive to soil for potted plants to be used outdoors.
Water - a big must for container gardens
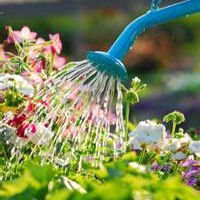
Watering is essential to successful container growing. It sounds like a “no brainer” but it is important. Plants in containers need to be watered more frequently than those in bed gardens.
Plants in containers are generally packed into a small amount of soil and it tends to dry out quicker than soil in the ground, especially in hot or windy conditions. Unlike plants you put directly into the ground, there is no place for the roots to stretch in search of water.
If your plants are wilting and you think you may be watering too much, or not enough, tap the bottom of the pot. A gush of water indicates over watering. If the plant loosens from the container instead, slide it out of the pot and check the roots. If the roots are firm and healthy, not black or slimy, the problem is lack of water, not too much.
Be sure when you water, that you soak all the soil in the container, not just on top or around the edges. Water until the excess runs through the drainage holes. If the container has gotten too dry though, the water will run along the inside of the pot and out instead of soaking through the soil. Check the soil at least two inches down into the pot to make sure it is moist.
I’ve found that if you have a really dry pot, especially a hanging basket, that filling a tub or bucket with water and setting the basket right down in it is a good way to make sure it gets soaked completely through. Or, adjust your garden hose to just a trickle and lay it in the container for awhile. It will soak slowly through the soil. My mother swears by soaker hoses and you can wind these through your containers and turn them on and water lots of your containers at once, but slowly so that the soil can soak up the water.
During the growing season, watering early in the day allows roots to absorb moisture with minimal loss from evaporation.
Container growing may require a second watering on really hot or windy days. A light watering before dark will replenish moisture to the roots. Try to water the soil, not the foliage, and avoid night time watering - this promotes disease.
Since watering is so important to container growing, you might want to add moisture gel (above) to your potting mix. This stuff is great and can be purchased at gardening centers.
One tablespoon of moisture gel will hold a quart of water. The roots in your plants can then access the water when they need it.
This is very good to use if it is inconvenient for you to water everyday, or if you like terracotta pots that wick up moisture.

Serious gardeners may want to invest in a slow-drip irrigation
system. You can purchase these commercially, but I also found a way you
can make your own at almost no cost.
An inexpensive gardening help is an adjustable nozzle head for your hose. I couldn't get along with out mine. It has several settings from shower to soak to mist. It saves a lot of time and lets me quickly adjust the water flow with a quick turn. The shower setting also allows a group of containers to be watered quickly. Invest in one – it’ll be the best low-cost investment you've ever made for your container growing success.
You can also buy containers that are “self watering”. They have a reservoir that you fill with water and the potting mix wicks up the moisture as needed. Self watering containers come in hanging baskets, window boxes, pots and troughs. There are also kits that can be purchased to fit existing containers.
If you are having trouble keeping containers watered during the hottest part of the summer, group them together. The foliage will create a canopy that shades the mix and keeps it cool. It will also slow evaporation. Grouped containers make watering easier too.
Mulching
Container gardens benefit from mulching. A two to three inch layer of mulch will cool the soil and help it retain moisture. Soil that is one inch below a layer of mulch can be up to 10 degrees cooler than unmulched soil at the same depth. Mulch reduces weed growth and organic mulch improves your soil as it decomposes. Shredded or chipped bark, compost or cocoa hulls make good mulches.
Drainage is essential for container growing
Good drainage is absolutely required for successful container growing. Too much water can cause problems – rotting roots for one. Also, plants need air and if the soil in a container stays too wet, the plant doesn’t get enough. It can actually “suffocate”.
Try not to use saucers under your plants, or if you do, make sure you tip them to empty them any time water has built up in them. Set your containers up on bricks, or pottery feet to allow them to drain well.
All pots should have drainage holes. A good rule of thumb is about 1 square inch
of drainage hole to 1 square foot of the container base. Too many drainage holes is better than too
few. Make sure if you buy a plastic
container that has a marking on it for a hole that you drill through that with
a drill or work a sharp screw driver or knife through it to open up that
space.
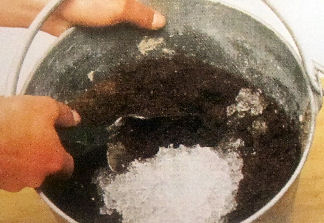
Fertilizer
The best container growing occurs when plants are regularly fertilized. Plants in container gardens are planted in a relatively small area of soil with limited nutrients to begin with, and since container gardens need watered more often, these nutrients are depleted quicker than they would be in garden beds.
Add a slow release granular form of fertilizer to the soil for your containers before you plant. For container gardens, use about half of the recommended amount for garden beds. In container gardens, you are better off with too little fertilizer than too much. You don't want to "burn" your plants with too much food.
Container growing of plants like hydrangeas or azaleas, will require special feeding. To acquire good growth and color, they need special fertilizer or soil additives to make their soil mix the correct pH (a measure of the soil's acidity or alkalinity). When you purchase these types of plants, follow their planting guidelines and add fertilizer as recommended.
Yellowed foliage usually indicates that a plant needs fertilizer or doesnt have the right balance of acidity in its soil. This can be corrected by proper feeding.
In addition to adding fertilizer to your soil, supplement feeding with a water soluble fertilizer that you can add to your watering can or connect to your hose or sprayer. I generally do this every 2 weeks or so during the growing season.
If you plant perennials, trees or shrubs in containers, you will want to add some fertilizer to their soil every spring. Just take out the top two or three inches of soil from the container and replace it with some fresh soil mixed with fertilizer.
Seeds? Cuttings or mature plants?
Plants to be used in container growing can be started several ways. Do you want to start your gardens from seed? Do you know how to use cuttings from your existing plants to make more of them? Or do you prefer planting mature plants that are already established? There are advantages to each method of growing container gardens - decide which works best for you.
Return from Container Growing to Container Gardening Tips
Return Home enjoycontainergardening.com

Gardening Resources
Click the link below to visit my aStore @ Amazon -
Books & How To Help
Garden Tools & Supplies
Online Plants
To make watering easier, invest in a hose wand and use watering spikes in bottles to make slow drip irrigation for your containers.
New! Comments
Please leave me a comment and let me know if you like what you see here and if the information is helpful. Thanks.