
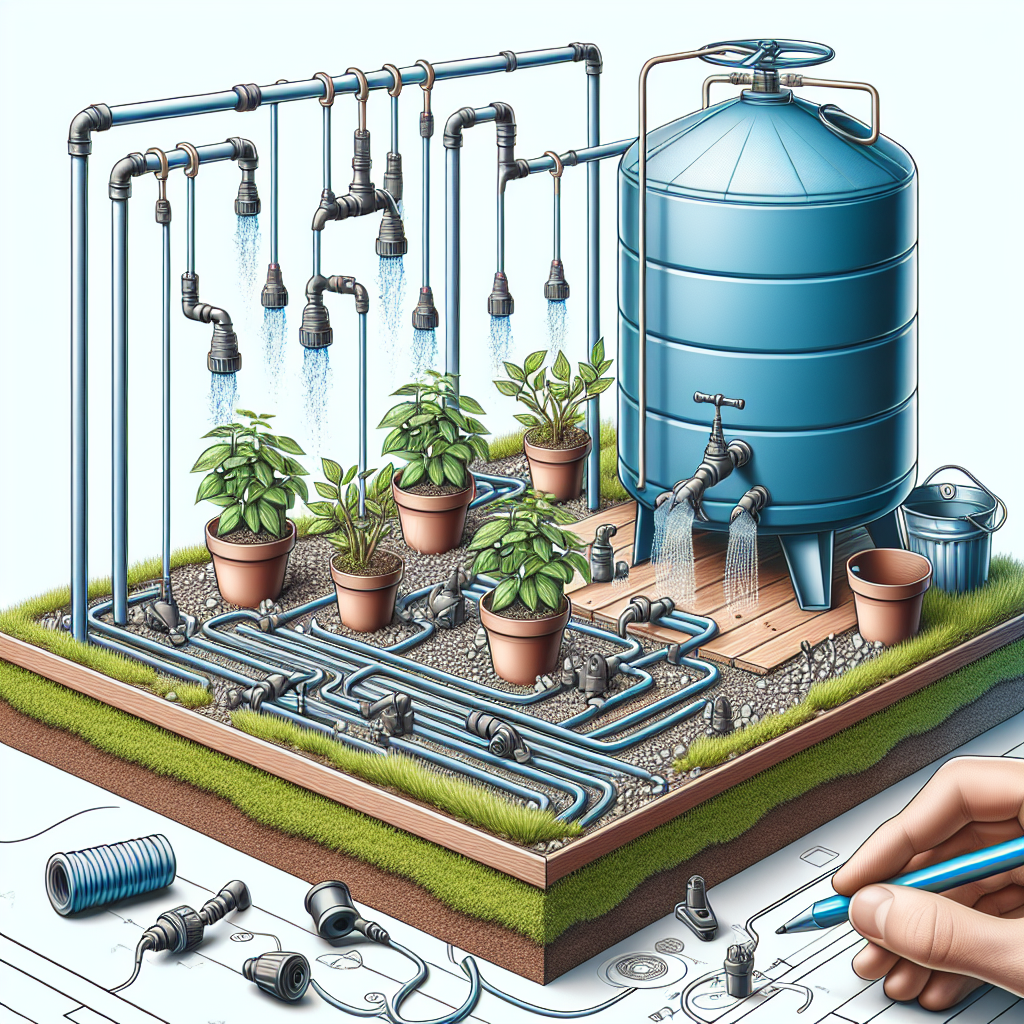

If you’re looking for an efficient way to water your plants without the hassle of constant manual watering, a slow drip irrigation system may be the perfect solution for you. This method delivers water directly to the roots of your plants, minimizing waste and promoting healthy growth. In this article, we’ll guide you through the process of setting up a slow drip irrigation system for your plants.
Step 1: Choose the Right Materials
Before you can set up your slow drip irrigation system, you’ll need to gather the necessary materials. Some common items you’ll need include:
– Drip tubing: This flexible tubing will deliver water directly to your plants.
– Emitters: These devices will release water slowly and evenly along the length of the tubing.
– Pressure regulator: This component will ensure that water flows at a steady rate through the system.
– Filter: A filter will help prevent clogs in your emitters by removing debris from the water.
– Timer: A timer will allow you to automate your watering schedule.
You can find these materials at most garden supply stores or online retailers. Make sure to choose high-quality components that are suitable for your specific needs.
Step 2: Plan Your Layout
Before installing your slow drip irrigation system, it’s important to plan out where you want to place your tubing and emitters. Consider factors such as plant spacing, soil type, and sun exposure when determining the layout of your system.
Start by measuring and mapping out the areas where you want to install your tubing. Keep in mind that some plants may require more or less water than others, so consider grouping them accordingly. It’s also a good idea to create a separate zone for plants with different watering needs.
Once you have a layout in mind, mark where you want to place your emitters along the tubing. Emitters should be spaced based on the specific watering requirements of each plant, so be sure to research this information beforehand.
Step 3: Install Your System
Now it’s time to install your slow drip irrigation system. Start by connecting one end of the drip tubing to a water source, such as an outdoor faucet or hose bib. Be sure to secure the connection with a hose clamp or other appropriate fastener.
Next, lay out the tubing according to your planned layout, making sure to secure it in place with stakes or clips as needed. As you go along, connect emitters at each marked location using fittings that are compatible with both the tubing and emitters.
Once all emitters are attached, install a pressure regulator and filter between the water source and tubing to ensure proper flow and prevent clogs. Finally, set up a timer if desired to automate your watering schedule.
Step 4: Adjust and Maintain Your System
After setting up your slow drip irrigation system, it’s important to regularly monitor and adjust its performance as needed. Check for leaks or clogs in the tubing and emitters, adjusting their placement if necessary. You may also need to fine-tune the flow rate of individual emitters based on plant needs.
In addition, be mindful of changing weather conditions that may affect watering requirements. Adjust your watering schedule as needed depending on factors such as temperature and rainfall levels.
Finally, periodically flush out your system by running clean water through it to remove any buildup or debris that could cause blockages. Regular maintenance will help ensure that your slow drip irrigation system continues to operate efficiently and effectively over time.
In conclusion,…
Setting up a slow drip irrigation system for your plants can be an effective way to promote healthy growth while conserving water resources. By following these steps and maintaining regular upkeep of your system, you can enjoy lush gardens with minimal effort on your part. So why not give it a try today?


