

Ferns are beautiful and elegant plants that can thrive indoors as well as outdoors. However, ferns require a specific level of humidity to thrive and stay healthy. One way to provide this necessary humidity is by creating a humidity tray for your ferns in containers. A humidity tray is a simple and effective way to increase the moisture levels around your ferns, mimicking their natural habitat and helping them flourish. In this article, we will discuss how to create a humidity tray for your ferns in containers.
Why Do Ferns Need Humidity?
Ferns are ancient plants that have been on Earth for millions of years. They are typically found in moist, humid environments such as tropical rainforests or damp woodlands. In order to thrive, ferns require high levels of humidity to keep their fronds healthy and prevent them from drying out.
When grown indoors, ferns may struggle to get the necessary humidity levels they need to flourish. Central heating, air conditioning, and low humidity levels can all dry out the air around your ferns, leading to crispy fronds and poor growth.
Creating a humidity tray for your ferns can help combat these low humidity levels by increasing the moisture in the air around your plants. This extra moisture will help keep your ferns healthy and happy, allowing them to thrive in an indoor environment.
How to Create a Humidity Tray
Creating a humidity tray for your ferns is a simple and inexpensive way to increase the moisture levels around your plants. Follow these steps to create a humidity tray for your ferns in containers:
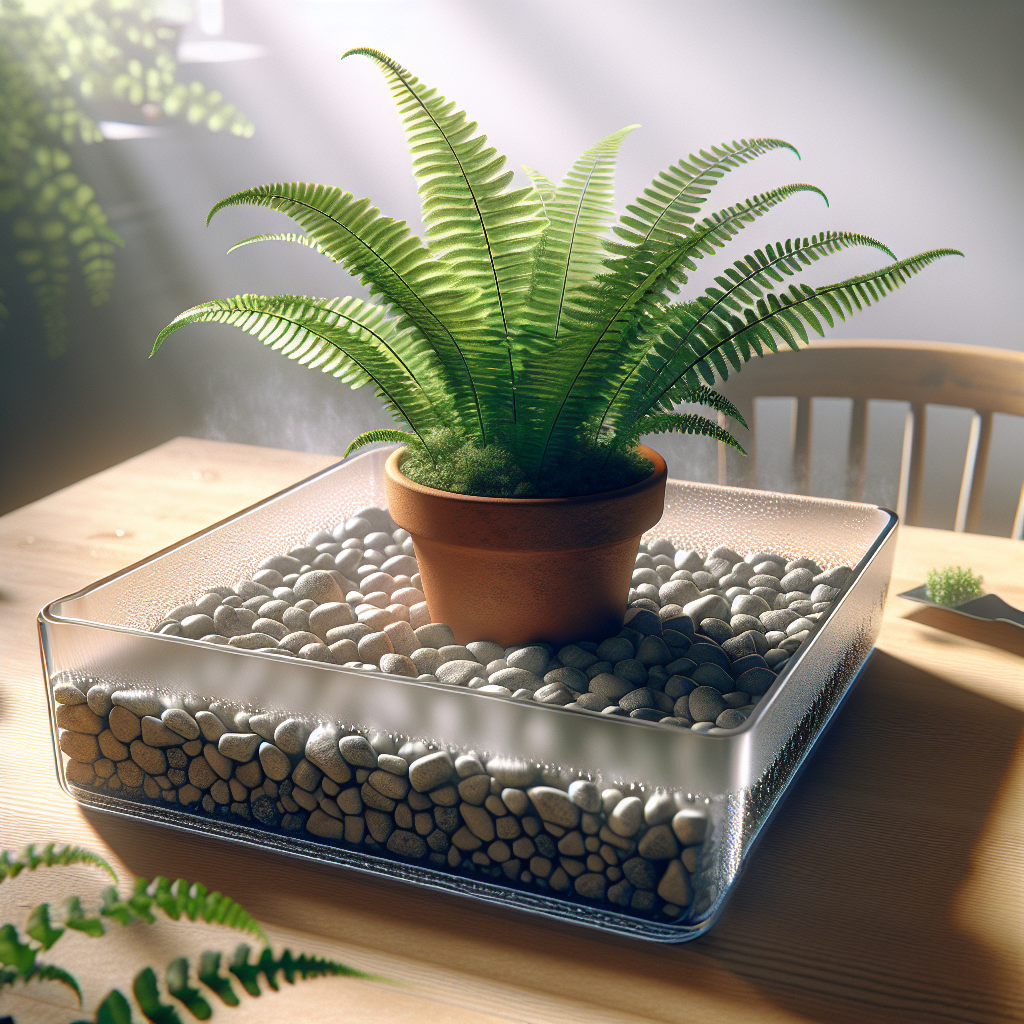
1. Choose a Tray: Start by selecting a shallow tray or saucer that is slightly larger than the bottom of your plant container. The tray should be able to hold water without overflowing onto the surface it sits on.
2. Add Pebbles or Stones: Fill the bottom of the tray with small pebbles or stones. These will elevate the plant container above the water level, ensuring that excess moisture does not come into direct contact with your plant’s roots.
3. Add Water: Pour water into the tray until it reaches just below the top of the pebbles or stones. Make sure not to submerge the pebbles completely as you want them to act as a barrier between the water and your plant container.
4. Place Plant Container: Set your plant container on top of the pebbles or stones in the tray. The container should sit slightly above the water level so that it does not come into direct contact with any standing water.
5. Monitor Water Levels: Check the water level in the tray regularly and top up as needed to maintain adequate moisture levels around your fern.
Benefits of Using a Humidity Tray
There are several benefits to using a humidity tray for your ferns in containers:
1. Prevent Drying Out: A humidity tray helps prevent your fern from drying out by increasing moisture levels around your plant.
2. Mimic Natural Habitat: By creating a more humid environment for your plants, you are replicating their natural habitat and helping them thrive.
3. Promote Healthy Growth: Proper hydration is essential for healthy plant growth, and using a humidity tray can help ensure that your fern stays hydrated and happy.
4. Easy Maintenance: Creating a humidity tray is simple and requires minimal upkeep once set up. Just remember to check water levels regularly!
In conclusion, creating a humidity tray for your ferns in containers is an easy and effective way to increase moisture levels around your plants and help them thrive indoors. By following these simple steps, you can provide your fern with the necessary humidity it needs while adding an elegant touch to its display space.


