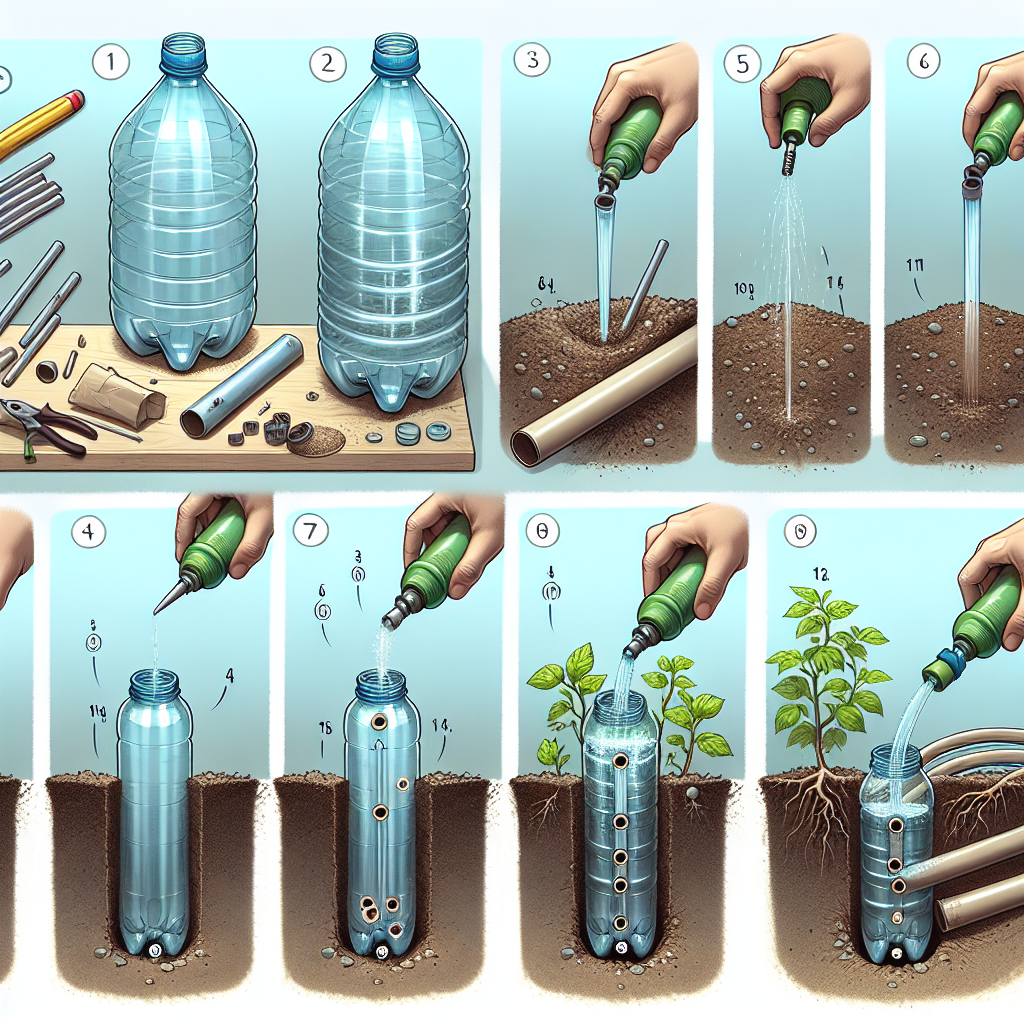
Irrigation systems are crucial for ensuring that plants receive the proper amount of water they need to thrive. One popular method of irrigation is a slow drip system, which delivers water directly to the base of plants at a slow and steady rate, allowing for more efficient watering and water conservation. In this article, we will discuss how to build a slow drip irrigation system on a budget, so you can keep your garden healthy without breaking the bank.
Benefits of a Slow Drip Irrigation System
Before we dive into the steps for building a slow drip irrigation system, let’s first explore why this method is beneficial for your garden. Slow drip irrigation offers several advantages over traditional watering methods, including:
1. Water conservation: By delivering water directly to the roots of plants, a slow drip system reduces water waste through evaporation and runoff.
2. Improved plant health: Slow watering encourages deeper root growth, leading to healthier and more resilient plants.
3. Reduced weed growth: Watering directly at the base of plants helps prevent weeds from germinating and competing for resources.
4. Time savings: Once installed, a slow drip system requires minimal maintenance and can be set on a timer for hands-free watering.
Now that you understand the benefits of a slow drip irrigation system, let’s move on to how you can build one on a budget.
Steps to Build a Slow Drip Irrigation System
1. Plan Your Layout: Before purchasing any materials, carefully plan out the layout of your irrigation system. Consider the size and shape of your garden beds, as well as the location of existing plants and obstacles such as fences or walkways. Map out where you want to place your drip lines to ensure thorough coverage.
2. Gather Materials: To build a basic slow drip irrigation system, you will need:
– Soaker hoses or porous tubing: These allow water to seep out slowly along their length.
– Hose connectors and end caps
– Pressure regulator
– Timer (optional)
– Stakes or clips to secure hoses in place
– Mulch or landscaping fabric (optional)
3. Connect Your Components: Start by connecting your soaker hoses or porous tubing according to your planned layout. Use hose connectors and end caps as needed to create a closed loop or individual lines for each plant bed.
4. Install Pressure Regulator: Attach a pressure regulator to your main water source before connecting it to your soaker hoses or tubing. This will ensure that water is delivered at a consistent pressure throughout the system.
5. Secure Hoses in Place: Use stakes or clips to secure your soaker hoses in place along the base of plants. Be sure not to kink or bend the hoses too tightly, as this can restrict water flow.
6. Test Your System: Turn on your main water source and check for any leaks or irregularities in water flow. Adjust pressure regulator as needed to achieve optimal watering.
7. Add Mulch or Landscaping Fabric (Optional): To further conserve water and prevent evaporation, consider adding mulch or landscaping fabric around plants in conjunction with your drip lines.
Maintaining Your Slow Drip Irrigation System
Once you have built your slow drip irrigation system, it’s important to maintain it properly for optimal performance:
– Check regularly for clogs or leaks in hoses.
– Adjust watering schedule based on weather conditions.
– Inspect connections and fittings periodically for wear.
– Clean filters and pressure regulators as needed.
– Winterize your system by draining hoses before freezing temperatures arrive (if applicable).
By following these steps and tips above, you can build an effective slow drip irrigation system on a budget that will keep your garden healthy while saving time and resources. Give it a try in your own garden today!


