

Incorporating Slow Drip Irrigation into Your Garden Routine
Maintaining a lush and healthy garden can be a time-consuming task, especially when it comes to watering your plants. Traditional methods of watering, such as using a hose or sprinkler system, can be inefficient and wasteful. This is where slow drip irrigation comes in.
What is Slow Drip Irrigation?
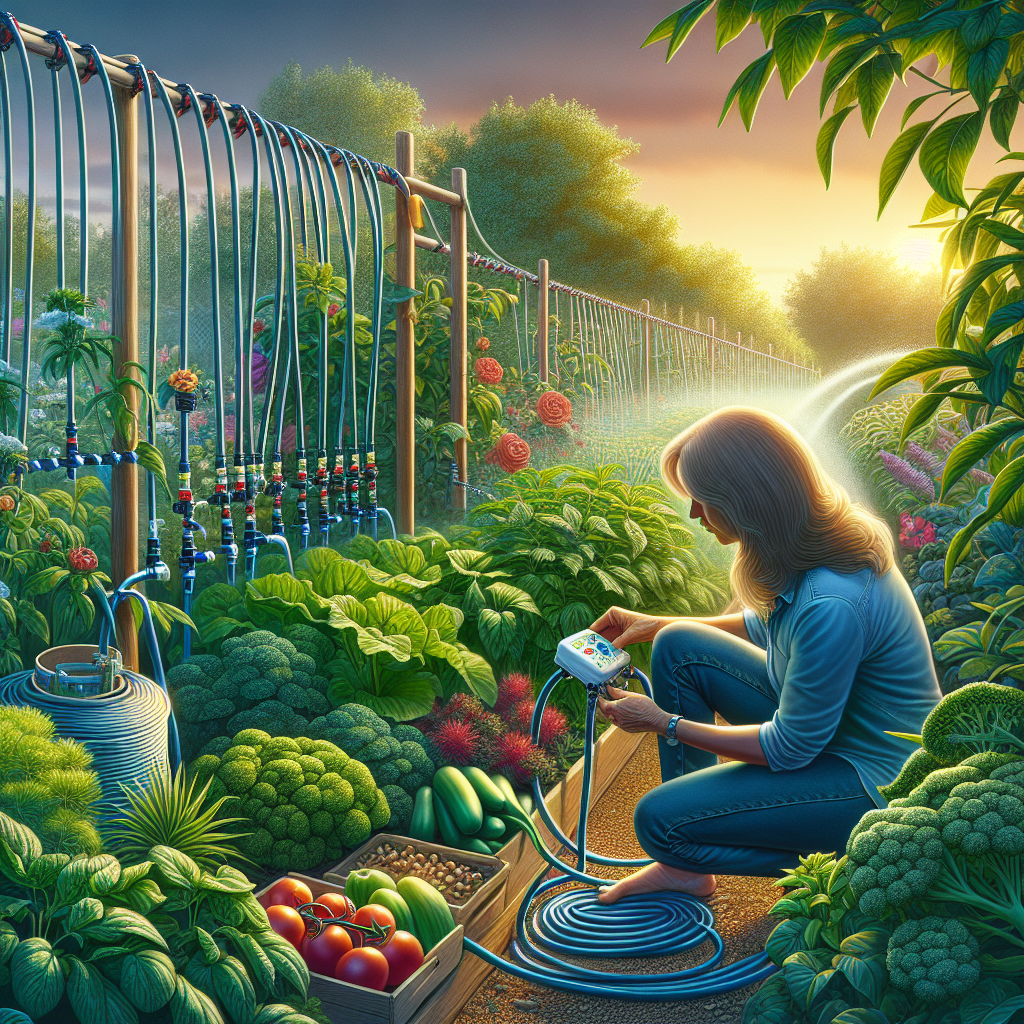
Slow drip irrigation is a method of delivering water directly to the roots of plants at a slow and steady rate. This technique involves placing small tubes or hoses near the base of your plants, which allows water to seep out slowly over an extended period of time. This ensures that the water reaches the roots where it is needed most, without any runoff or evaporation.
Why Use Slow Drip Irrigation?
There are several benefits to incorporating slow drip irrigation into your garden routine. One of the main advantages is that it helps to conserve water. By delivering water directly to the roots of your plants, you can reduce evaporation and runoff, which can waste a significant amount of water. This not only helps you save money on your water bill but also helps to protect the environment.
Another benefit of using slow drip irrigation is that it promotes healthier plant growth. By providing a consistent and even supply of water to your plants’ roots, you can help them develop strong and deep root systems. This makes them more resilient to drought conditions and better able to absorb nutrients from the soil.
Additionally, slow drip irrigation can help reduce weed growth in your garden. By targeting water directly at the base of your plants, you are less likely to accidentally water nearby weeds, which can help prevent them from taking over your garden space.
How to Incorporate Slow Drip Irrigation into Your Garden Routine
If you’re interested in incorporating slow drip irrigation into your garden routine, there are a few steps you can take to get started.
1. Assess Your Garden Layout
The first step is to assess your garden layout and determine where you want to install your slow drip irrigation system. Consider the types of plants you have in your garden and their specific watering needs. You may want to group together plants with similar watering requirements so that you can adjust the flow rate for each section accordingly.
2. Choose Your Materials
Next, you’ll need to gather the necessary materials for your slow drip irrigation system. This may include tubing or hoses, connectors, emitters (which regulate the flow of water), stakes or clips for securing the tubing in place, and a timer if you want to automate the watering process.
3. Install Your System
Once you have all of your materials ready, it’s time to install your slow drip irrigation system. Start by laying out the tubing or hoses around your plants, making sure they are positioned near the base of each plant. Use stakes or clips to secure the tubing in place and prevent it from shifting or becoming tangled.
4. Adjust Your Flow Rate
After installing your system, be sure to adjust the flow rate for each section based on your plants’ watering needs. You may need to experiment with different emitter sizes or spacing until you find the right balance for each area of your garden.
5. Monitor and Maintain Your System
Finally, be sure to monitor your slow drip irrigation system regularly and make any necessary adjustments as needed. Check for clogs or leaks in the tubing, ensure that all emitters are functioning properly, and adjust the flow rate as necessary based on weather conditions or changes in plant growth.
In conclusion,
Incorporating slow drip irrigation into your garden routine can help you save time and water while promoting healthier plant growth in your garden space.


